


A SwiftUI List is a fundamental component of any user interface, as It allows you to display vertically scrolling data in the most efficient way. You can use a ScrollView too, but it’s not the most efficient decision in terms of performance as the List.
SwiftUI List is the best option for presenting dynamic content, such as arrays or ranges of data, in a structured and user-friendly manner. The SwiftUI List automatically handles the layout and scrolling of its content, making it easy to create interactive and aesthetically pleasing lists.
In this tutorial we will answer the following questions: How To Create a List in SwiftUI?, How to Use a List in SwiftUI?, and How to Customize a SwiftUI List?
Creating Your First SwiftUI List
You use SwiftUI List for any user interface that presents data in a structured and scrollable format. A List in SwiftUI is the equivalent to a UITableView in UIKit, but with a more declarative and concise syntax. So probably the first question to answer is How to Create a List in SwiftUI?.
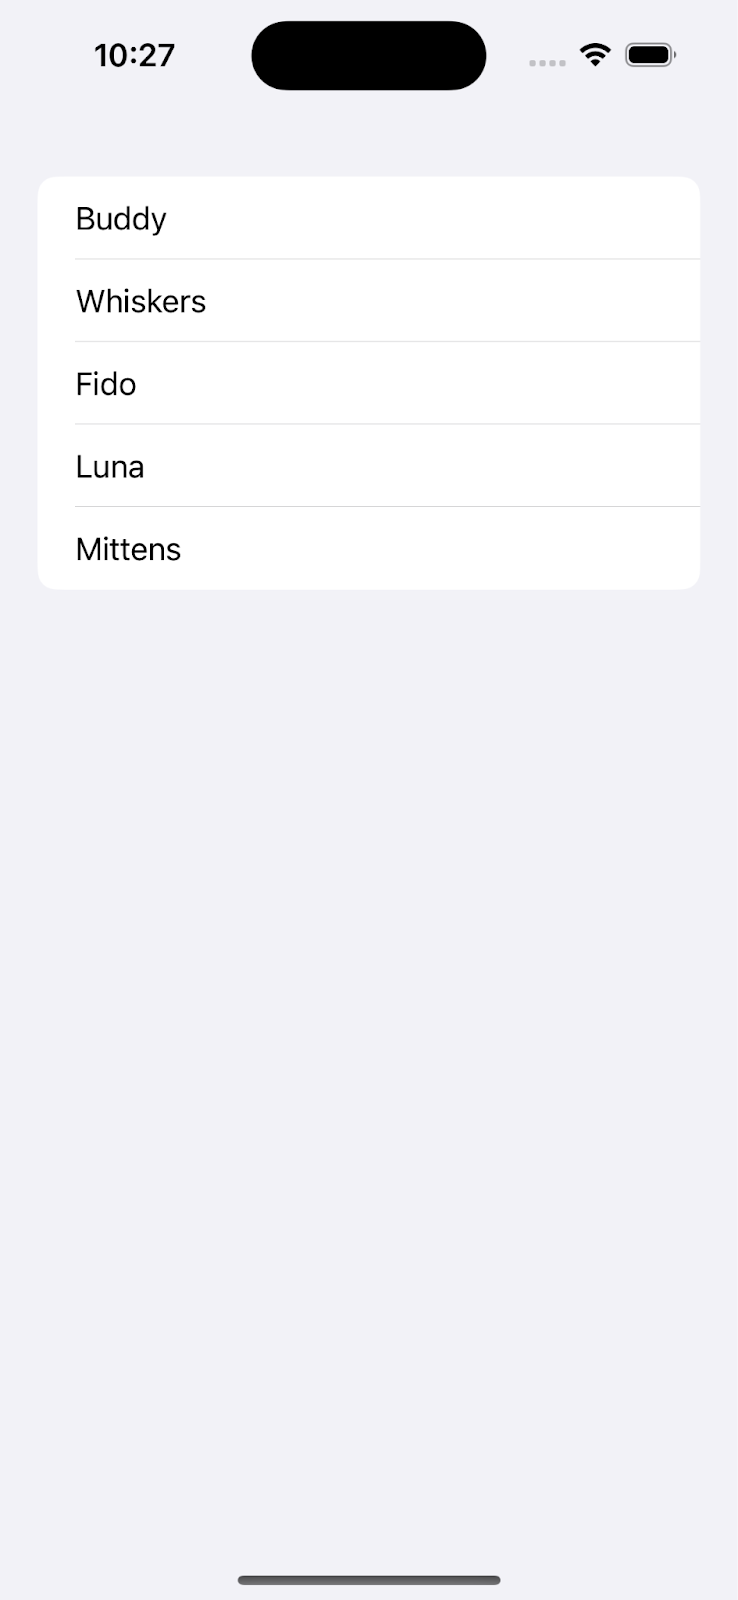
A SwiftUI List can be easily created by providing a data array, which SwiftUI automatically arranges into a single column. Let’s create our first SwiftUI List, a pet list:
CODE: https://gist.github.com/devs-rootstrap/f30248ee73689c540a256417e134b399.js?file=PetList.swift
We define a Pet struct that conforms to Identifiable, which means it has a unique id property. We also add a name property to store the pet's name.
In the ContentView, we create an array of Pet instances with some sample data.
We use the List View to display the array of pets. The List view takes a closure that defines how to render each item in the list. In this case, we simply display the pet's name using a Text view.
Note that this is a very basic example where we are using the default iOS platform style without any special customization, but you can customize the appearance and behavior of the list by using various modifiers and views provided by SwiftUI, something that we will see later in this article.
SwiftUI List Style
You can customize your SwiftUI List to quickly apply a set of visual attributes to your List.
SwiftUI provides several style options that you can use or even combine. Additionally, you can create your own custom styles to match the design of your app and keep a consistent look.
Let's look at some example:
CODE: https://gist.github.com/devs-rootstrap/f30248ee73689c540a256417e134b399.js?file=StyledPetList.swift
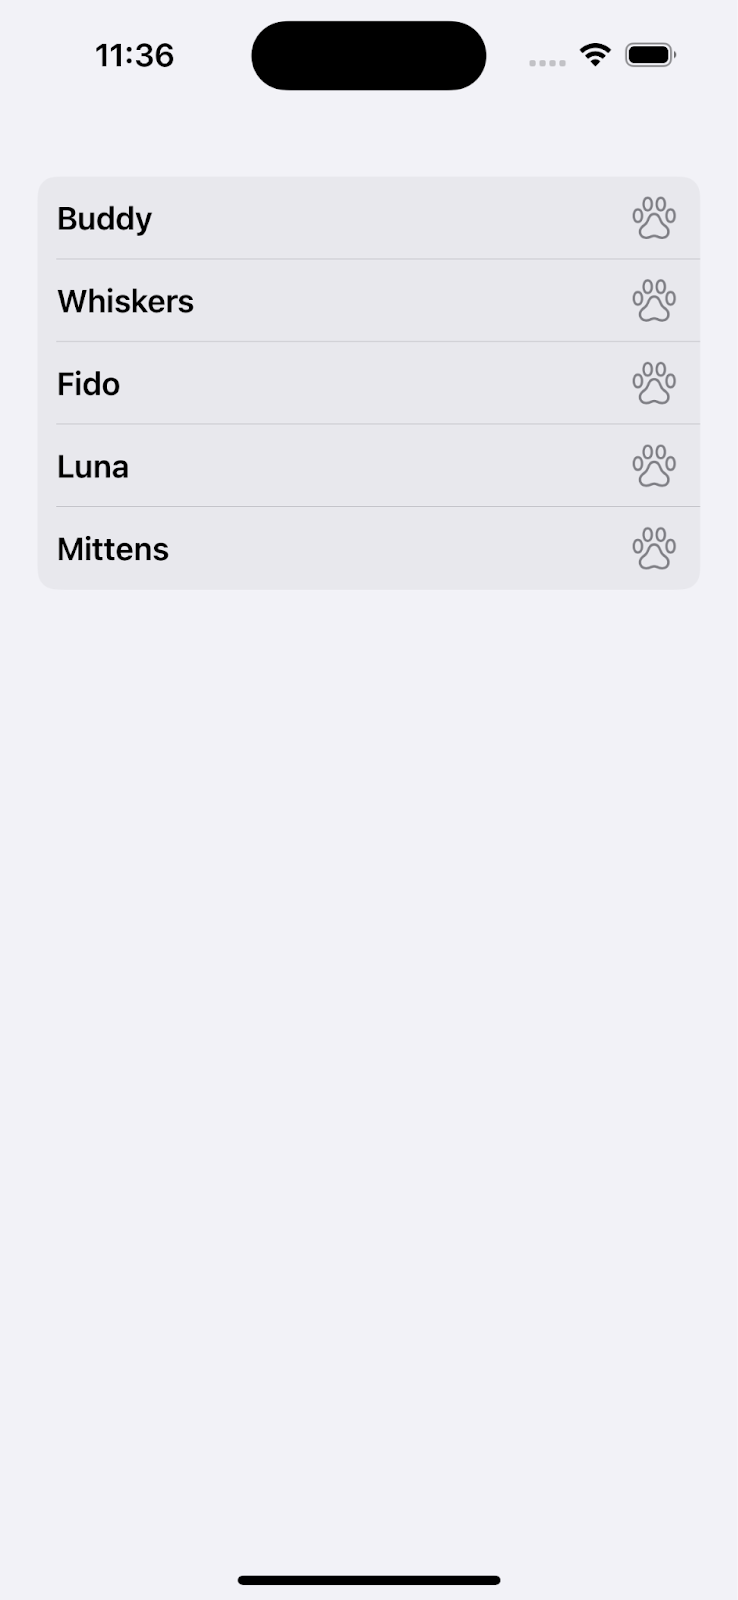
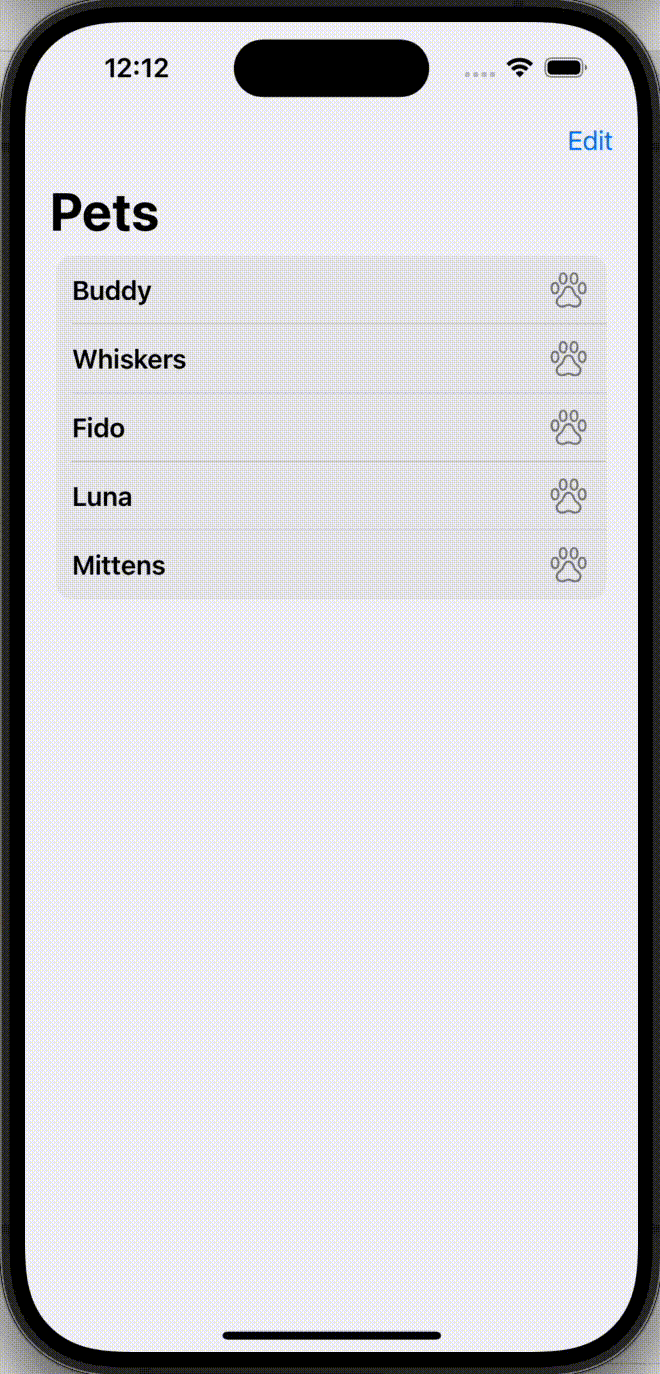
In the example we added an HStack to each SwiftUI List item, which allows us to display multiple views side by side. We customized the Text view to display the pet's name, and styled it with a headline font and primary color.
We also added an Image view to display a paw print icon, and styled it with a large image scale and secondary color. The Spacer() will push the image to the right side of the list item.
We added a .listRowBackground modifier to set the background color of each list item to a light gray and a .listRowInsets modifier to add some padding around each list item.
Finally, we changed the list style to InsetGroupedListStyle() to give the list a more modern look.
SwiftUI List CustomRow
If for some reason you need to add more details to a list item, It’s a common practice in SwiftUI List to extract rows into separate views. This approach has mainly two benefits: It allows us to reuse our CustomRow in our code and our SwiftUI List code will look simpler to read and understand.
Let’s see an example of how we can implement a custom row view in our pet example.
CODE: https://gist.github.com/devs-rootstrap/f30248ee73689c540a256417e134b399.js?file=PetCustomRow.swift
SwiftUI List Move Row
In addition to the default way to show the information, If you need to allow to the user organize the information that is shown in the SwiftUI List, you can implement the row move.
As you can see in the following example, we organize our favorite pets by name just moving each row.
CODE: https://gist.github.com/devs-rootstrap/f30248ee73689c540a256417e134b399.js?file=MovePet.swift
SwiftUI List Delete Row
In addition to move, If you need to allow the user to delete the information that is shown in the SwiftUI List, you can implement the row delete.
As you can see in the following example, we can delete a pet from our list.
CODE: https://gist.github.com/devs-rootstrap/f30248ee73689c540a256417e134b399.js?file=DeletePet.swift
The takeaway
SwiftUI provides a powerful and flexible way to create list in your apps. With its declarative syntax and intuitive modifiers, you can easily customize the appearance and behavior of your interface to match the design and functionality of your app.
When creating lists in your app, it's important to consider your app's overall design and functionality, as well as the accessibility needs of your users. By following best practices and guidelines for Lists design and behavior, you can create a more user-friendly and accessible apps.
In this article, we've explored the basics of working with lists in SwiftUI. We started with a simple list of static items, and then added more complexity by using a dynamic array of custom data. We also learned how to customize the appearance of each list item using a custom row view.
But that's not all - we also added the ability to move and delete rows in the list, making our app more interactive and user-friendly.
We hope this article has given you a solid foundation in working with lists in SwiftUI. Whether you're just starting out with SwiftUI or are an experienced developer, we hope you've learned something new and useful. Happy coding!

.png)
